If you are looking to enhance your personal brand or if you own a company, having an online presence will help you achieve both your sales and reputation goals. For this, you can definitely choose a website in WordPress. In this post, we are going to squeeze out every drop of what you need to know about how to build a website in WordPress from scratch.
What is WordPress?
WordPress is undoubtedly one of the best web content management systems (CMS). It is an ideal system for those people who do not have technical knowledge. You only need to have specialized WordPress hosting and a domain for your website. WordPress contains an endless number of plugins that allow you to expand the capabilities of WordPress and take it to a totally professional level. Here are the best advantages of WordPress we have:
- It is easy to use
- Has great potential
- Continuous development and strength
- The large number of plugins that allow you to make almost any page format
- It is easy to optimize SEO
- It has wide support
- Has continuous updates, etc.
Although WordPress is associated mainly as a tool to create blogs. It also works perfectly to create business websites, digital newspapers, online stores, portfolios, video channels, support forums, among others.
Today we bring you the best guide to build a WordPress site, with which you will learn step by step everything you need like:
- How to choose a domain name
- How to choose the best hosting for WordPress
- How to download and install WordPress
- How to adjust basic WordPress functions to build a website
- How to choose and install a WordPress theme
- How to install the must-have plugins for WordPress
- How to create your website content and much more
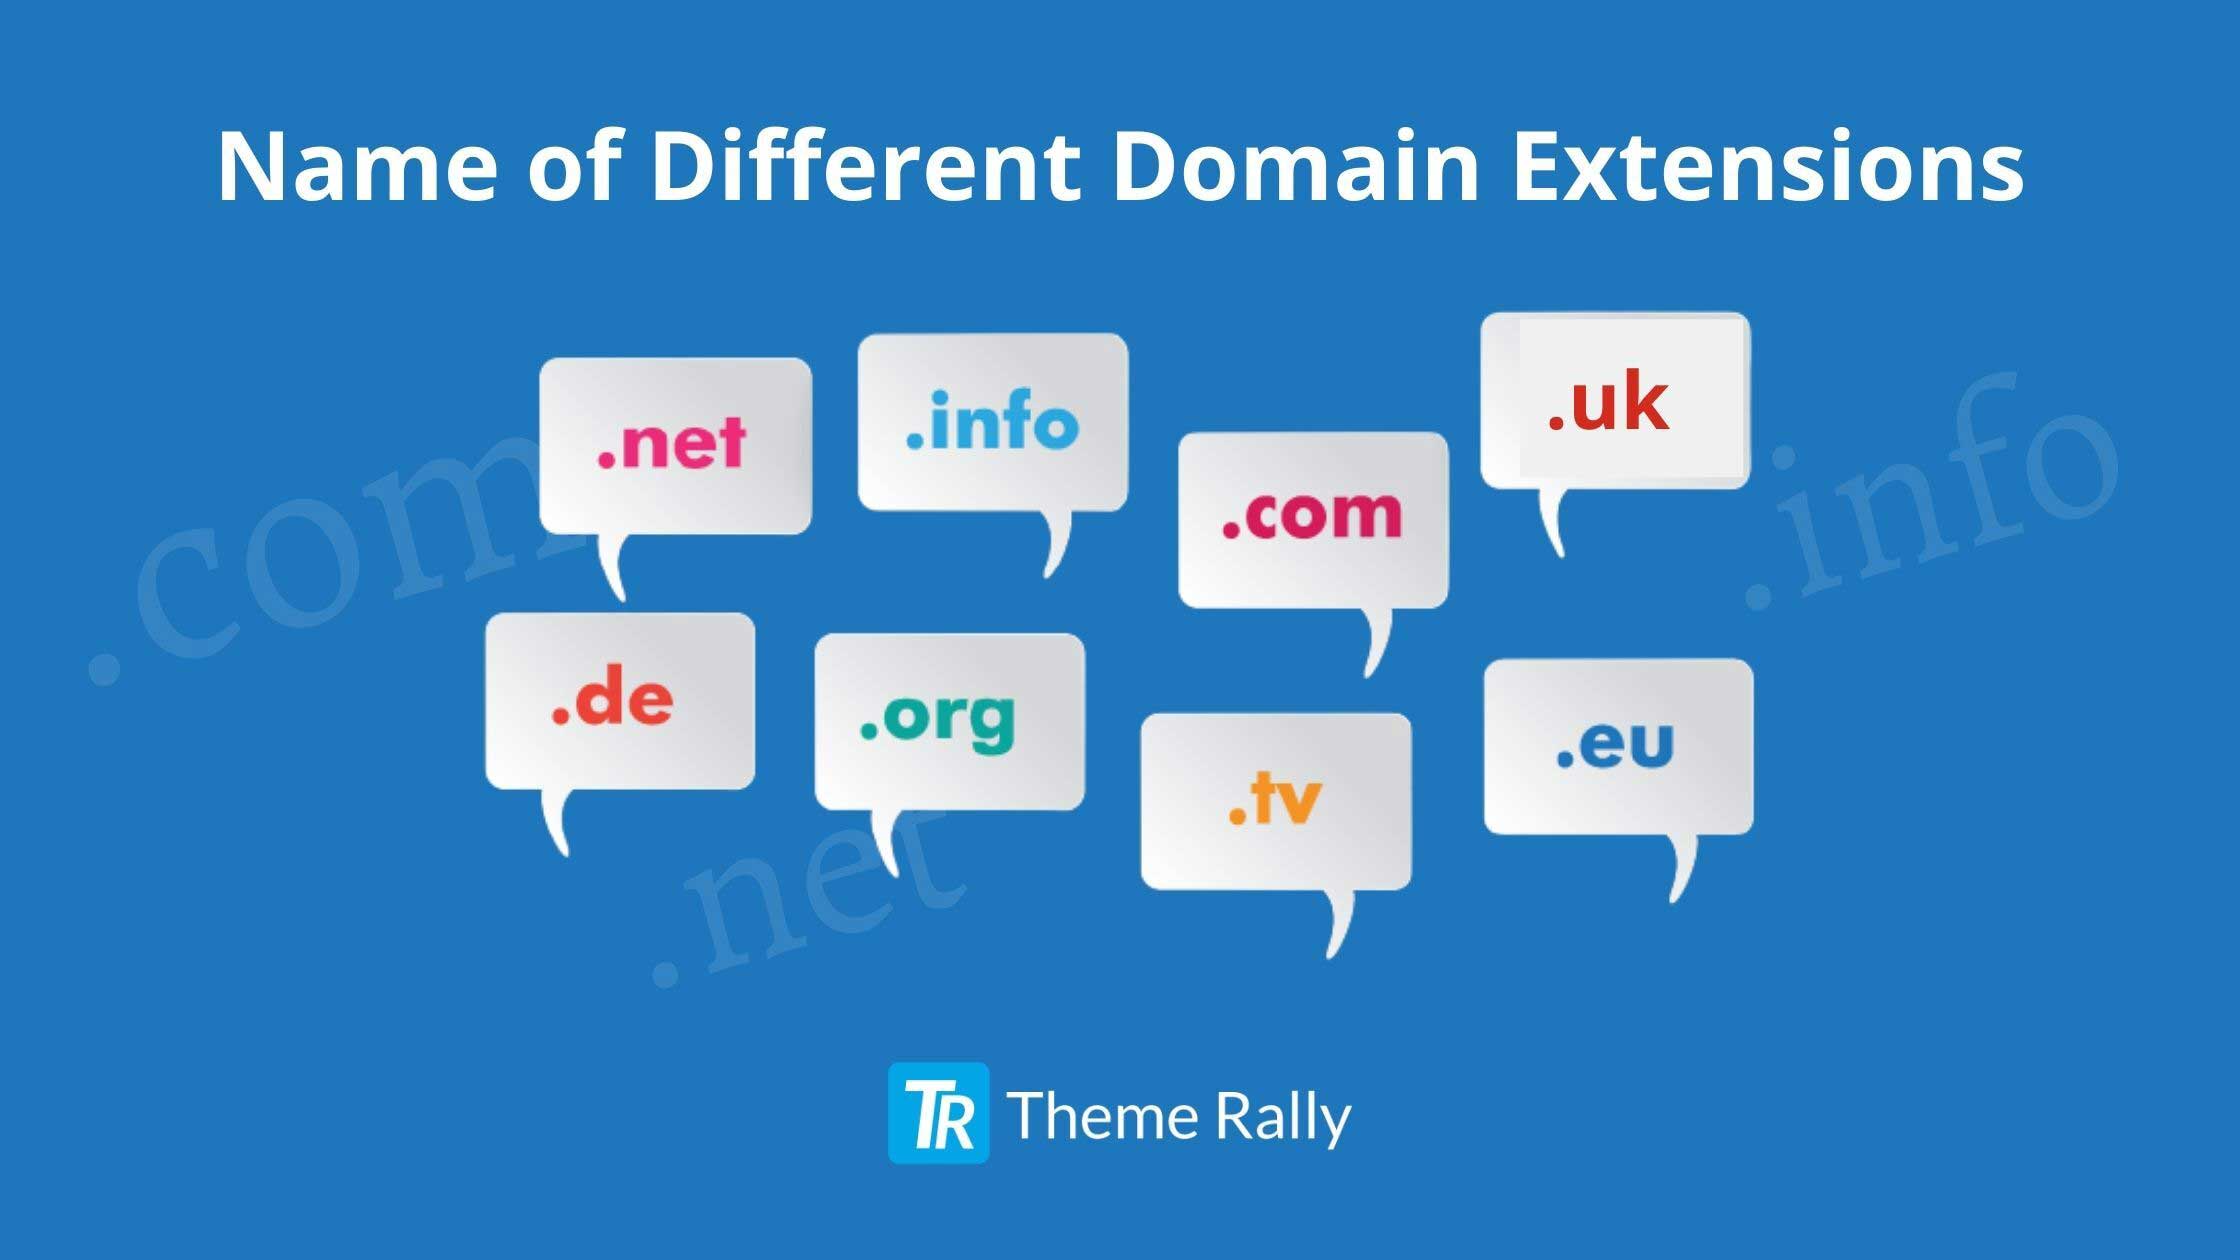
How to Choose a Domain Name
The name you assign to the domain will be your brand, it will be the appetizer for users to have reference to what your page is about, that is why it cannot be chosen lightly.
The process of choosing the domain will vary on the project you want to launch, it can be a blog, an online store, a company, or a niche page, etc.
That is why, when choosing a domain, certain considerations must be taken so that from the beginning, your project is aimed at success:
- It should be a visual name, short, simple, easy to remember and write.
- The domain must be clean, avoid using hyphens as much as possible since Google does not like them, and also the user will not easily retain the name, since that symbol that somehow cuts off its fluidity.
- Try that the name of the web domain represents your business, which makes a direct allusion to the subject you will be dealing with.
- Likewise, try that the domain contains the main keyword of your theme since it is still an important advantage in relation to positioning.
- Recently there is a predisposition to the personal brand name. This is ideal for people offering personal service. It is very positive to place the name of the owner of the page since it would be associating a service or product with the brand name.
- And finally, to check that you are on the right track, check with your friends and family to find out what they think.
Knowing how to choose the correct domain, now you have to choose the best hosting to host your WordPress website.
How to Choose the Best WordPress Hosting
Always the first step to making a website is to select a good hosting, which is nothing more than a hosting service. But you should choose a quality Premium WordPress hosting that offers you speed, usability, stability, security, and support, in order to guarantee the good performance of your page.
How to Know Which is the Best Hosting or Server for WordPress?
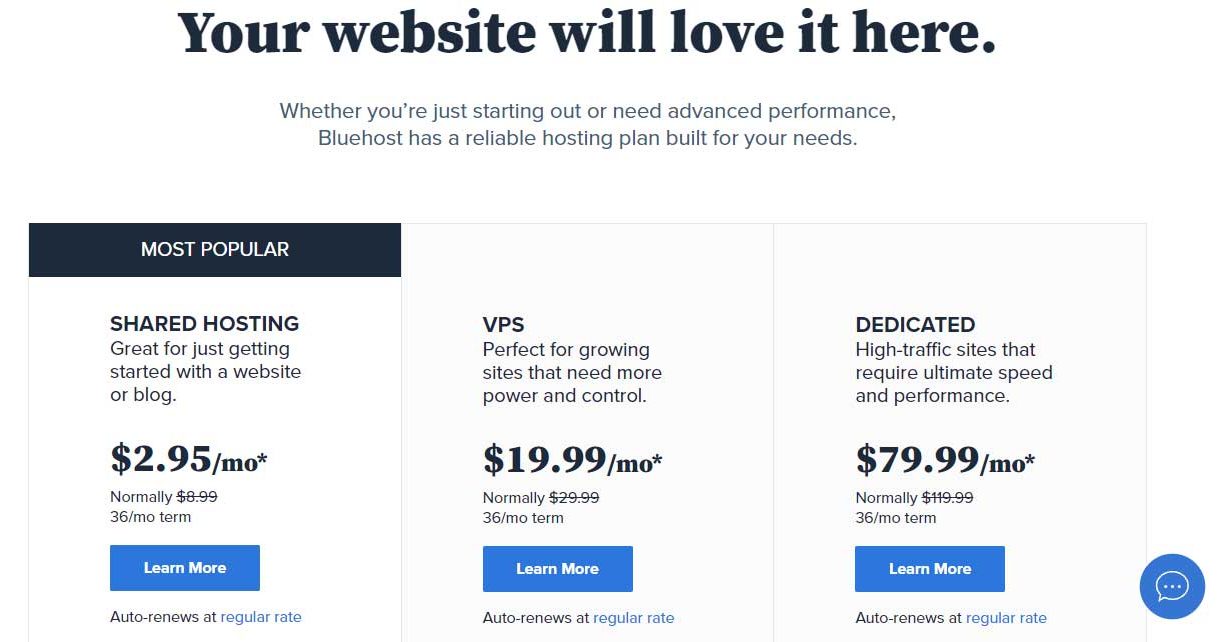
Among those that stand out, we have Bluehost since it is a hosting that offers excellent performance. There are many professionals who choose this hosting as it is a specialized hosting of excellent quality to build a WordPress website.
The services that Bluehost offers give us enough reasons to rank. In addition, it offers support for any type of website. With Bluehost, you will be able to have visibility all the time.
And as if that were not enough, the prices of Bluehost in relation to quality/price are really unbeatable. According to your needs, you can opt for SSD Hosting services; once there will be different plans and what each one includes. Best of all, they let you make the monthly payment. So you won’t need to have the money for a whole year.
On the other hand, it is said that Bluehost is an expert in WordPress for all the functionalities it offers; you will have the possibility to install WordPress easily. They also offer you the service of optimizing your page so that you have a good position in search engines.
So, if you want your website to work perfectly and have maximum security, good technical support, and the maximum loading speed to help you position yourself in Google, you will see that Bluehost is the best option at an excellent price.
How to Download and Install WordPress
Downloading and installing WordPress is a very easy process. However, when performing the procedure for the first time, it is very likely that you will need a step-by-step guide to ensure that you are doing the right thing.
WordPress can be downloaded in two ways: manually and automatically. However, the best way to create a website is by downloading and installing WordPress manually.
When opting for the manual way, you must download the WordPress installation file from the official page. Then the database must be created in the hosting, and then those files must be uploaded via FTP. Finally, everything must be joined by resorting to code configuration.
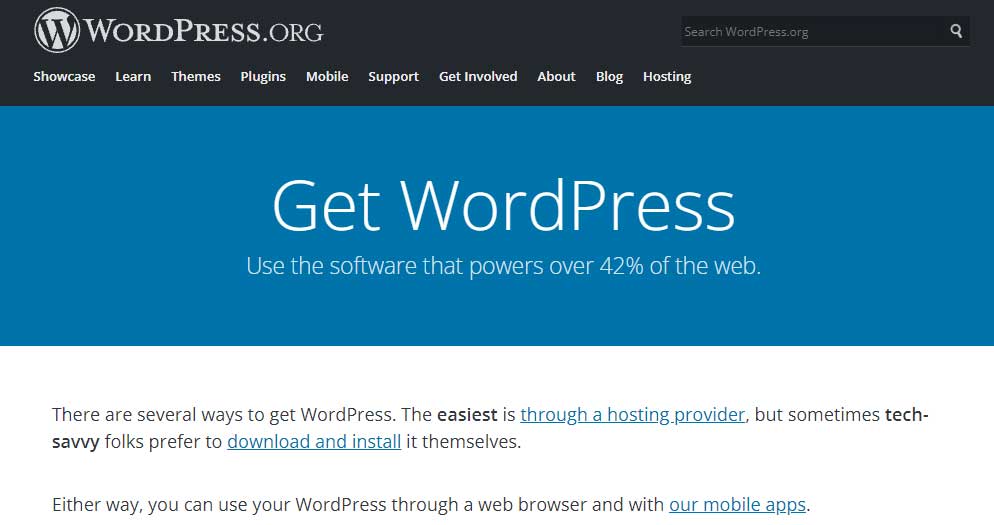
Download WordPress
On the official WordPress page, you can choose the version you prefer and download it in .zip format.
Install WordPress Manually
The next step to start the installation is to create a MySQL database with your username. If your hosting provider has a control panel, this will greatly facilitate the installation. The first thing you should do is go to the MySQL databases section. Then the database must be created; then you have to create a username and password. Finally, that user must be assigned to the database that you just created.
Then, after creating the database, you must unzip and upload the files that contain the wordpress.zip folder through the FTP service to the “public_html” directory if you want to install WordPress at the root of the domain.
It is within “public_html” where all the content of our website must be placed, always respecting the WordPress folder structure.
These are the files that contain the wordpress.zip folder : index.php, license.txt, readme.html, wp-activate.php, wp-admin, wp-blog-header.php, wp-comments-post.php, wp-config-sample.php, wp-content, wp-cron.php, wp-includes, wp-links-opml, wp-load, wp-login, wp-mail.php, wp-settins.php, wp- signup.php, wp-trackback.php, xmlrpc.php.
Once the installation files have been uploaded, the next step is to write the domain name in the address bar of your browser. A screen will then appear requesting the following information:
- The domain of our website.
- The username and password.
- And the connection data with the database server:
- Database name.
- Database username and password.
- Server host (it is recommended to put “localhost”)
- MySQL tables prefix.
At the end of the correct input of this data, WordPress will begin to install as fast as your server allows it. In general, in a minute or two it should be fully installed. So you could then access the administration panel of your website.
How to Adjust Basic WordPress Functions to Build Website
To access the WordPress control panel and be able to change the basic functions you must type in the address bar of your browser the following link: http://www.yourdomain.com/wp-login.php. You will get a page requesting the username and password of the site.
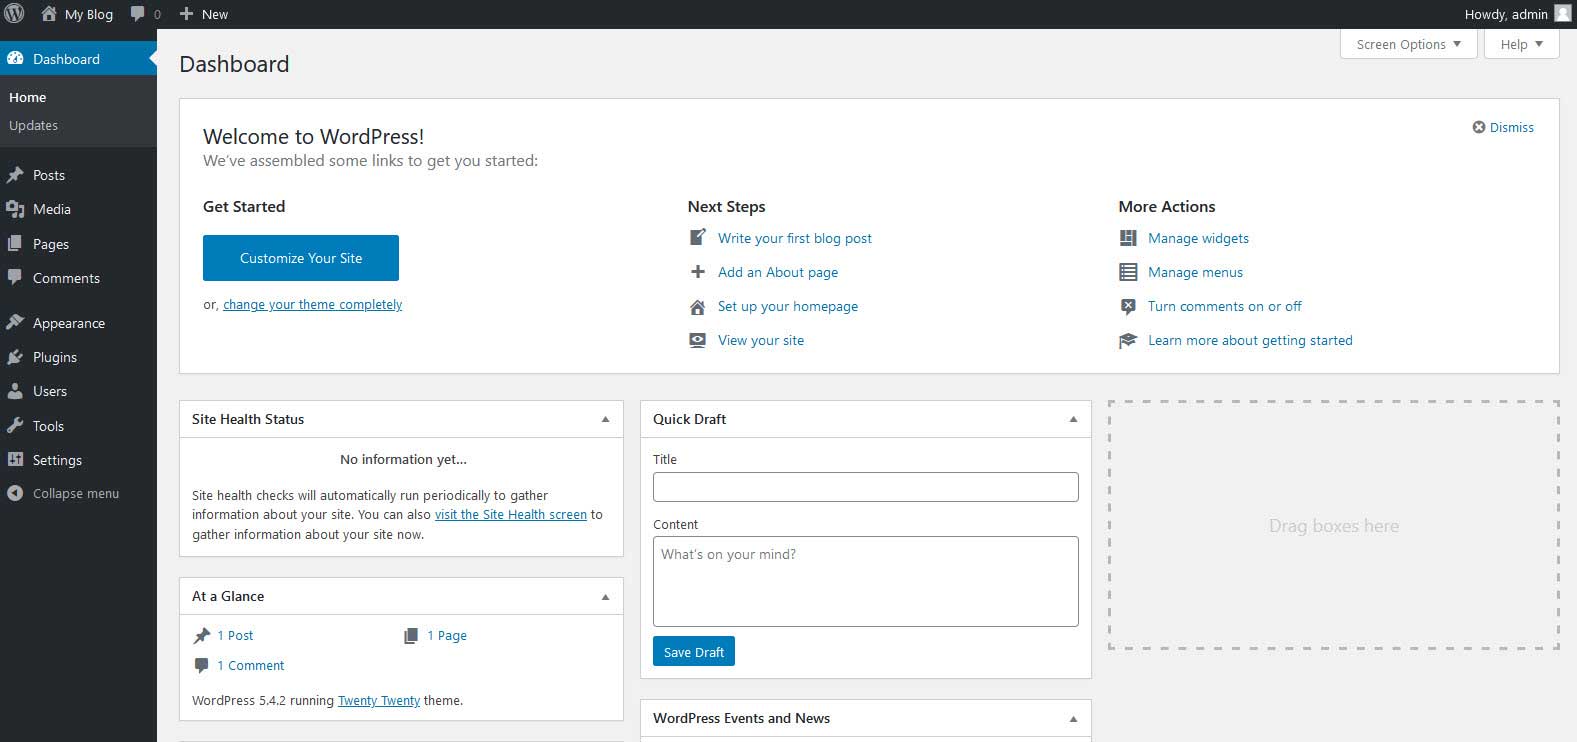
By doing this, you will be in the inside of your WordPress panel where you will be shown the options to start creating content. However, you must first configure the WordPress functions, located in the settings section. Among the main options to adjust we have:
The page title and description: For this, you must go to “Settings” and then to “General”, there you can check if the title you previously placed is the one you really want for your site. It is also important that you enter a description.
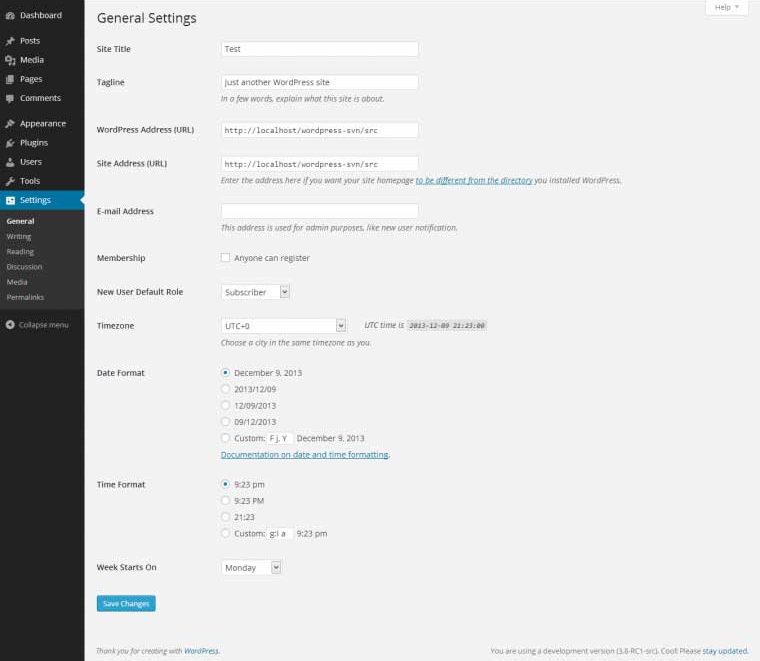
In this part of the settings, you can also change the associated email address. It is important that this address is up-to-date because this is where you will receive notifications of updates, messages that come from the contact form on the web, etc.
URL’s names: Go to “Settings and then“ Permanent Links” and select the option“ Post Name ”, this is important to do since you will define how the URLs will be created automatically each time you publish. By choosing this option, all your publications will default to the title of the publication in the URL. It’s Very convenient since the urls will have the keywords that you have placed in the title, ideal for SEO positioning.
Comments: Go to “Settings” and then to “Comments”, there you can decide the preferences of the users’ comments; for example, previous approval of the comments before being published.
Updates: This option is done by clicking on “Desktop” and then on “Updates”. It is important to always check this section to know about the new versions of WordPress and thus keep it updated.
There are a lot of adjustments to make. However, the ones we mentioned above are the main ones to consider before starting to design and create content on your website. Subsequently, it is important that you go through the settings again so that you can customize your preferences to the maximum. Also with the installation of new plugins, you will have more elements to configure.
How to Choose and Install a WordPress Theme
The choice of a template or theme for WordPress is one of the most important things in the process, almost as much as the choice of hosting for WordPress.
That is why it is time to design your website, and the fastest, most comfortable, and easy way for this is through the installation of a WordPress theme or template. With a pre-designed theme, you will have the opportunity to give structure and functionality to your site, you can add various elements such as headers, menus, change colors, add areas for content, among many other things.
Despite what many think because it is pre-designed, your site will lack creativity or originality, a theme or template will serve as a good basis for designing your completely personalized web page.
But, to be a really good theme, it must comply with certain things:
- It must comply with the rules of functionality.
- Have good coding.
- SEO friendliness.
By having these three little things, you will know that your chosen topic will get you on the right track. However, many other factors influence, so it is recommended to work with Premium WordPress themes, since they allow you to fully customize your page, in addition to meeting all official requirements.
How to Install a Theme to Build a WordPress Website?
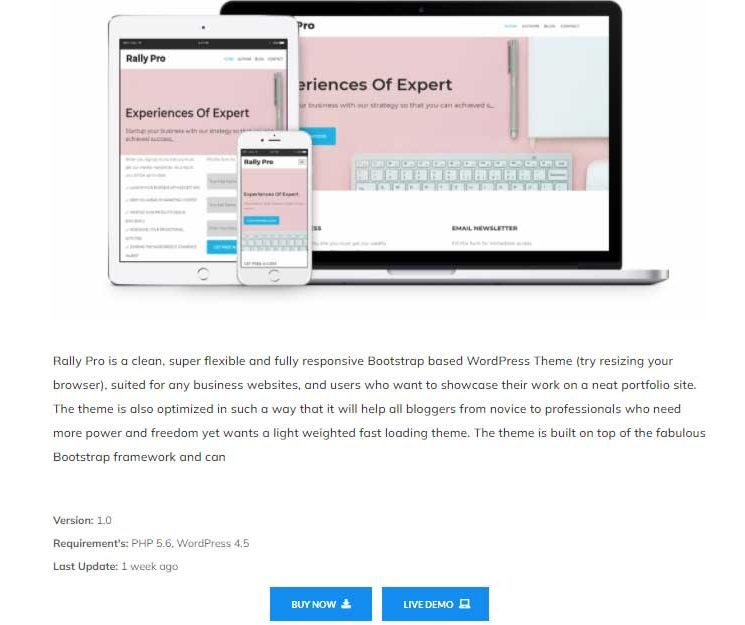
In the market, there are several premium and free themes available for WordPress, but among the best platforms where you can get a theme for WordPress is Theme Rally. ThemeRally provides an amazing WordPress theme called Rally Pro. Developers have recently updated this theme and fixed all the bugs. So you will surely love this theme to build your WordPress website. When you download, this theme will save as a .zip file.
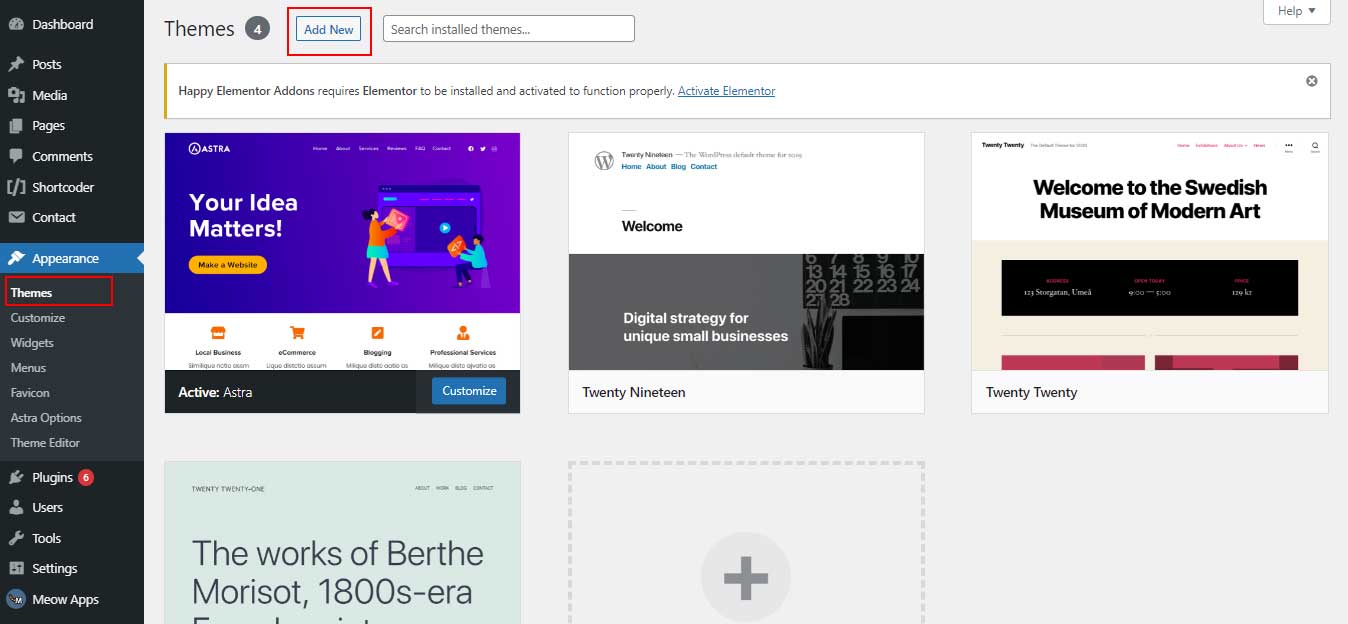
Next, you must unzip the theme file and locate the installation file. Now, from your WordPress control panel, you must click on the “Appearances” section and then “Themes”. There will be the themes that you have by default, which although they work well are very basic in relation to the customization options. However, the one that is first on the list is the asset on your page.
Subsequently, you must click on the “Add New” button, then on “Upload Theme”. You have to locate the theme installation .zip file and load it. Then click on “Install”. Wait a few minutes and it will appear in the topic list. You just have to click on “Activate” and this will be your new theme. Also, you can search for the demo content and install it.
After buying a theme from ThemeRally, it is very easy to import the file and install it. Just go to the Templates option in the dashboard and click there.
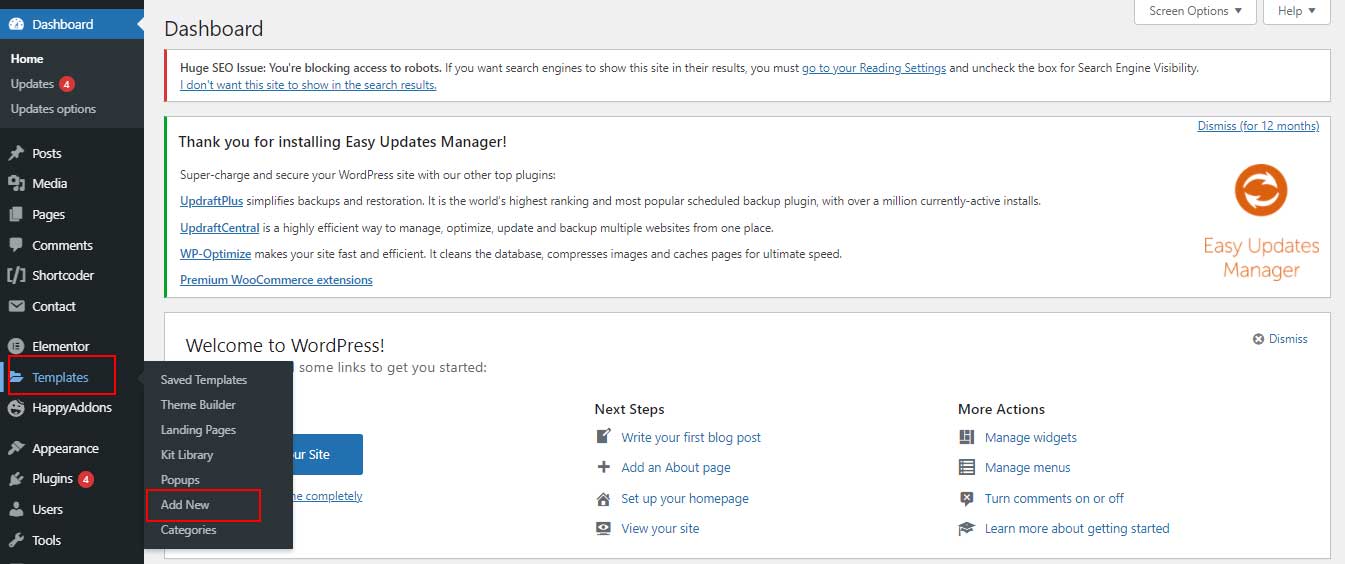
Then click on the choose file option and select the zip folder of the template. You have to unzip the folder before use.
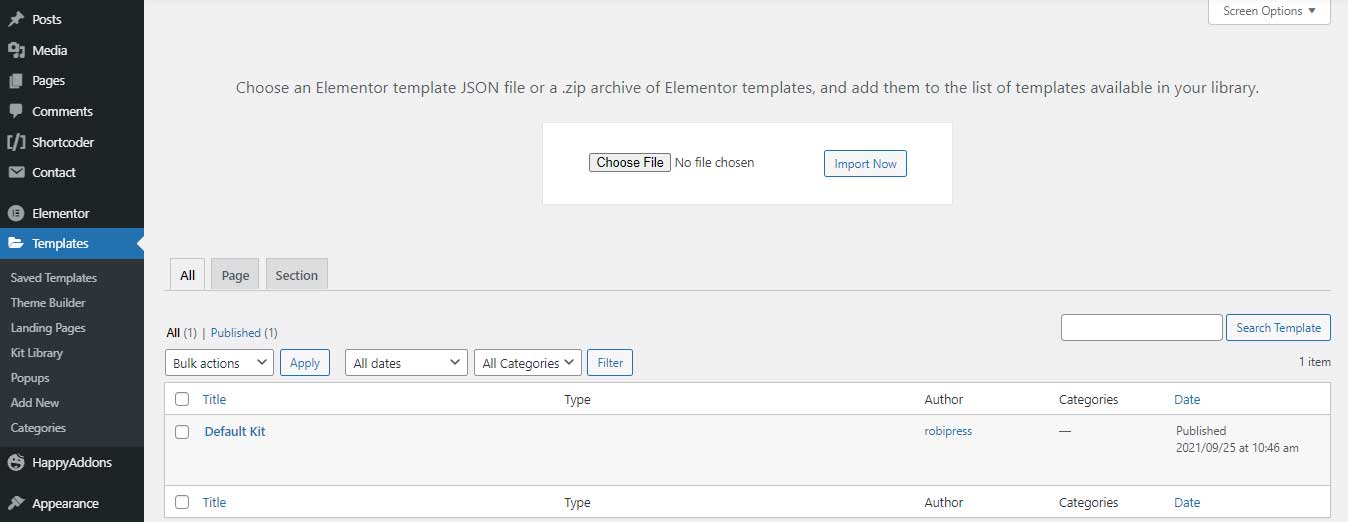
Then import the file, activate it. Your dashboard will take refresh automatically by itself and you will be able to use the template.
How to Install Must-have Plugins to Build WordPress Website
A plugin is a program that allows you to further customize the WordPress design and configuration of your website; it also allows you to add new add-ons and functionalities in a few minutes.
Currently, like themes, there are a large number of plugins on the official WordPress site. However, there are some plugins that are essential to install from the first moment if you want your website to work perfectly.
When installing a plugin you must take into account one of these four things:
- Ensure the security of your site.
- Improve the performance of the web page.
- Improve the visibility of the web page.
- Create bonds with visitors.
Essential Plugins in WordPress
It is important that each installed plugin fulfills at least one of these purposes and also does not harm the rest. Let’s look at some of these:
Yoast SEO: It is one of the essential plugins in terms of SEO and its techniques. It is used to optimize your entries for positioning in Google.
Sumo: With this plugin, you can link your blog to the social networks you use, create a pop-up to attract subscribers, create custom widgets, etc.
Contact Form 7: It is recommended that all websites have a contact section, so the site generates more trust and the user can contact the owner of the site. So with Contact Form 7, you can create a contact form for your website, you will have the option to configure it and determine which fields you want to be mandatory and which are not.
Anti-Spam Plugin: It is one of the best WordPress plugins. Basically, you can avoid unwanted comments with this plugin and it’s essential for your blog as it prohibits the entry of robots.

Wp Fastest Cache: This plugin will help you improve the loading times of your page, and therefore it will benefit you in relation to SEO. Once installed, you will only have to configure it and activate all the options that it allows you. Among other plugins that perform the same function and that are recognized, we have the WP Super Cache and Caché Enabler.
BackWPup: This plugin is recommended to perform a backup. You just have to configure it and create a backup as often as you set.
Google Analytics: It is a plugin that is used to monitor the statistics of your website. In general, what it does is synchronize your WordPress account with Google Analytics which includes a tracking code on your website that will allow you to study the visits you receive.
Easy Social Icons: It is one of the best free plugins. It allows you to add a widget to your sidebar with the icons of the social networks that you select.
![]()
Cookie Law Info: This plugin shows a small alert window with a message that your page uses cookies.

In the following link, we bring you a more extensive list of the essential plugins for WordPress for your website according to our criteria.
How to install plugins in WordPress?
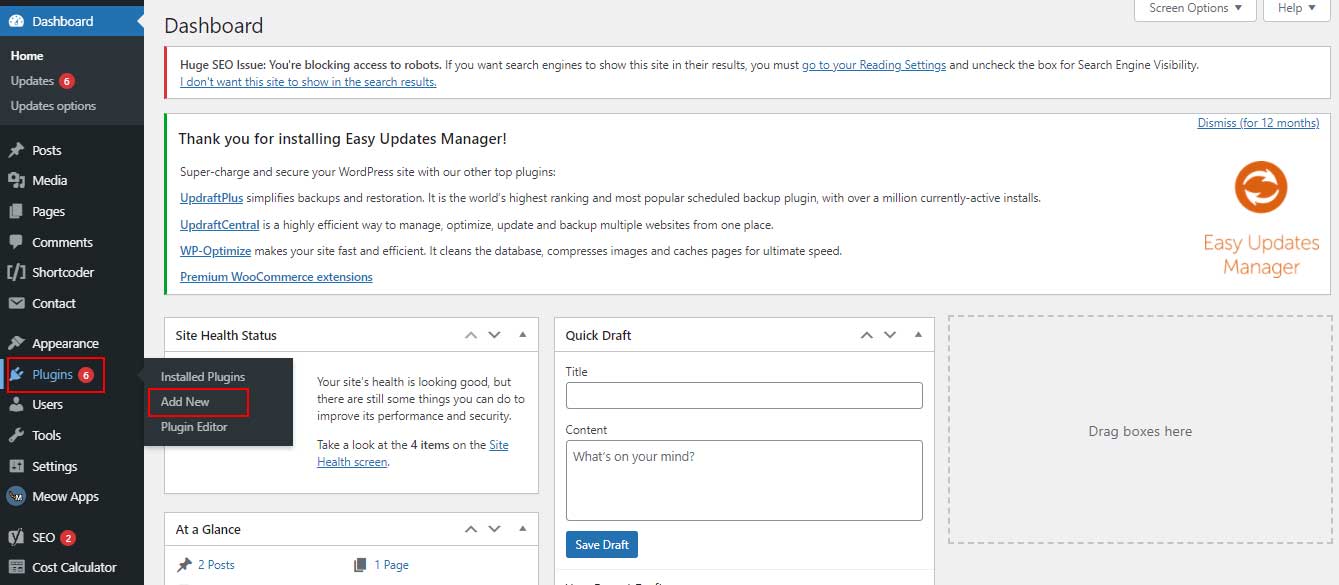
The plugins are installed directly in the Plugins section, located on the left side of the control panel. Once there, you must click on “Add New”, from there you can search for it on the official WordPress page, or you can also upload them from a .zip format by clicking on “Upload Plugin”.
How to Create Your Website Content
When you are clear about the design you want for your website and all the necessary tools that help you make it work perfectly, then you just have to move on to the content, a very important part of the creation of a website. Let’s go through the step by step from creating content to publishing it.
Edit the Home Page
This action can be done in two ways, but it will depend on:
- If your theme includes demo content and you have imported it.
- If your theme does not have demo content.
In case you have imported the demo content: You must go to “Settings”, then to “Reading” and “Frontpage sample”. Once there you can select one of the theme’s predesigned homes. If you have more than one, go testing them to see which one best suits your project, then to view it click on “Visit Site”.
Being in the home selected and already published, you can edit it by clicking on “Edit Page” located at the top of the screen. Once there, two things can happen:
1. You have a visual layout and therefore you can edit, move, delete your page more intuitively.
2. Or that only code appears, where you can search among the code for the text strings you want to change. In this case, it is necessary to have knowledge of HTML code.
If you do not have demo content: You must go to “Pages” and then “Add New”. Once there you can create your home page. If you have a visual layout editor, the task will be easier and more fun, you can add elements, edit them, etc. Add a title and content to proceed to click on the “Publish” button, located on the right side of the page.
But for it to appear as your home page you must go to “Settings” and then to “Reading” and set the newly created page as your home page.
Create the Sections to Build Your WordPress Website
Like the previous one, this action can be done in two ways.
In case you have imported the demo content: You can make use of the pages already created and customize them to the maximum. This fact will save you time and effort since you can build sections on predesigned pages.
To do this you must click on the “Pages” section and then on “All pages”. In this a list of the created pages will appear, you must choose one and click on “Edit page” and start emptying the content to your liking. As it is a page already published, and since changes have been made to it, you just have to click on the “Update” button located on the right side of the page.
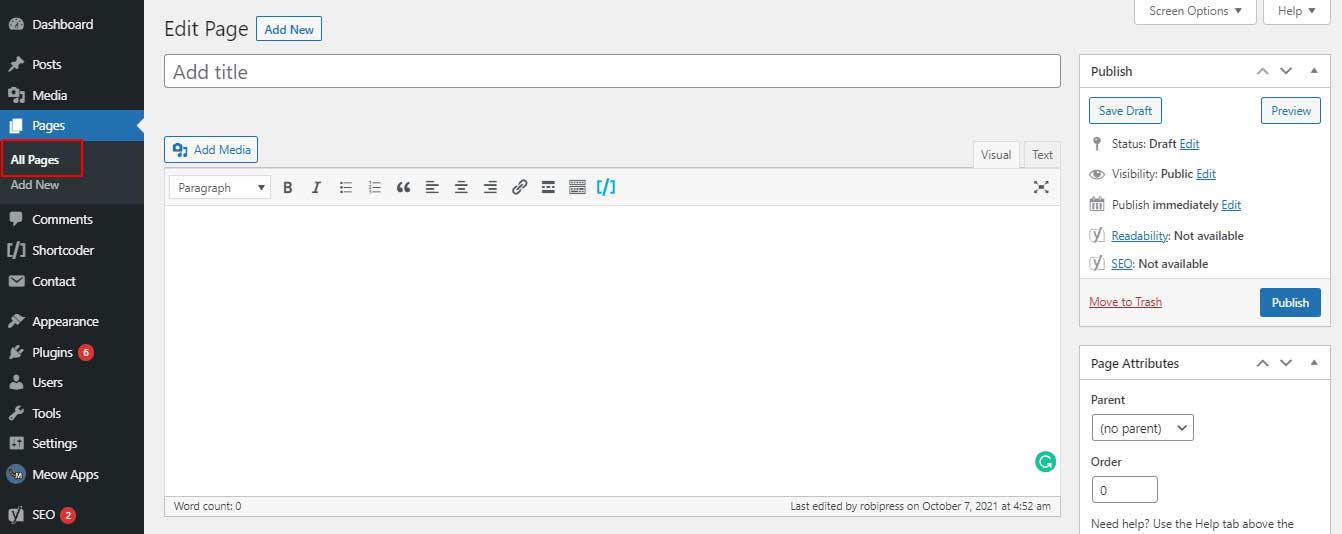
If you do not have demo content: You must go to “Pages” and then “Add New”, being there you will have the opportunity to create your sections. It works relatively the same as an entry, you must place a title, empty the content and after reviewing all the details (structure, colors, header, etc. located at the bottom of the page), and finally you must click on the button of “Publish” that is in the right part of the page.
Create and Edit Posts on Your WordPress Website
Create a post in WordPress is one of the things that you put attention to when creating a website in WordPress. With the post you can implement SEO strategies, promoting the arrival of visitors; also with the posts you can create a network of internal links throughout your website facilitating the journey of your visitors and Google.
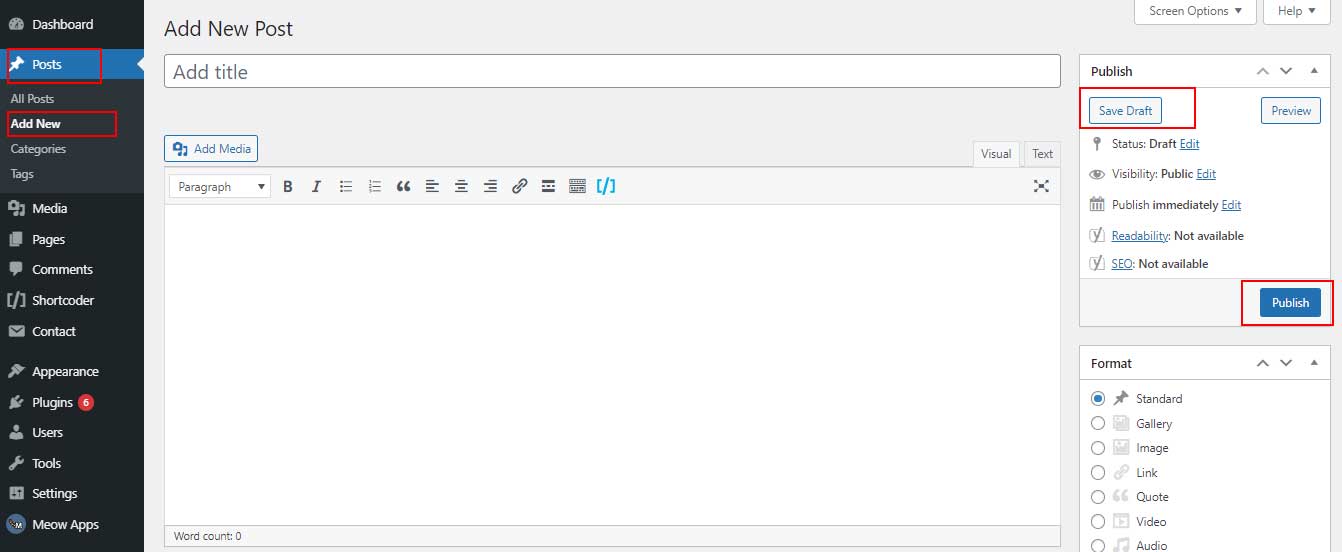
Being already in the ” Add New ” section, the procedure is relatively easy, you just have to be careful with the details. You will have a screen structured as follows:
Post Title: The post title must be related to the content. It should be eye-catching, contain the keywords with which you want to position yourself, it should not be very long. Ideally, it should not exceed 60 characters.
Entrance Body: For this part, WordPress has two editors, one in HTML code and the other visual. Being the second easier to handle if you do not have programming knowledge. The visual editor is very similar to other text editors, it has a toolbar to format the text.
Regarding the content, it is important that it is original and useful so that people read it completely and stay a long time on your page, it will help you directly with SEO positioning.
Always be careful not to copy or plagiarize content, since that will affect you directly with Google; in addition to giving you a bad reputation. Remember, it is useless to design an excellent website if you do not enrich it with good quality and useful content.
Publish Panel: The publication panel tells you the status of the publication. From this you can decide whether to leave the publication in draft or if you want to publish it; You can also modify and schedule the publication date, among other options.
Complete Building Your WordPress Website by Creating a Menu
How to Create a Menu in WordPress
To create a menu in WordPress you must go to the “Appearance” section and then click on “Menus. While there, you must click on “Create New Menu”. It is advisable to place a title on the menu, although it will not be viewed by users, it will serve as a reference.
Four types of buttons can be placed in any menu: those with links to your pages; those that have links to your posts; those that link a custom URL; and those that contain the categories of your page. However, it is recommended not to oversaturate these buttons and only add important pages or entries. And that these are the ones that give the visitor the opportunity to take them to the other pages or entries. Being clear about the above, it is time for you to start creating your menu. To do this first you need to go Appearance > Menus option in your WordPress dashboard.
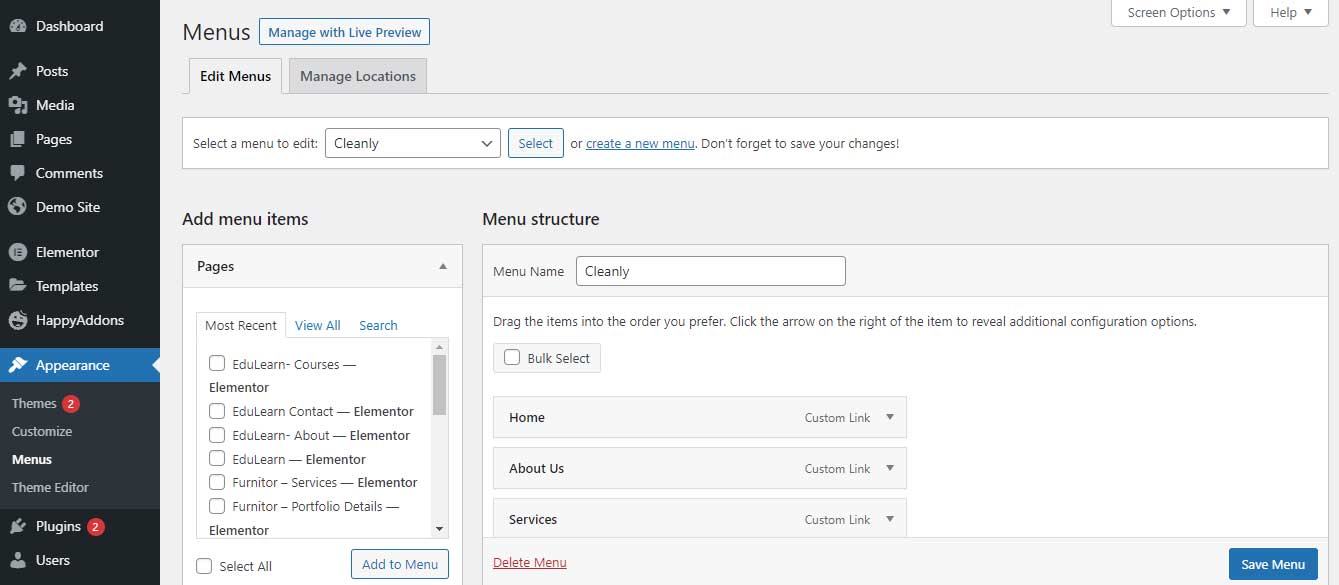
On the left side, you can add all the elements (pages, posts, custom links, and labels) to the menu. Basically, what you should do is select what you want to add to the menu and then click on the “Add to menu” button.
Automatically, these elements will appear on the right side in “Menu structure”, where each of these will be a button on your newly created menu. Finally, click on “Save menu” and you will have concluded the process.
Conclusion
Well, here is our tutorial on how to build a website in WordPress. We hope it has been a great help to you to build your WordPress website easily. It is not so tough to build a WordPress website, but for the lacking of good instructions, it becomes quite difficult to create a website.
We also have an amazing article on the reasons why WordPress is the best CMS for SEO. You will get all the amazing information about WordPress in this article.
So try yourself to build a WordPress website. Just follow our instructions carefully. And if you face any problems, please join our Theme Rally Community to ask your questions.